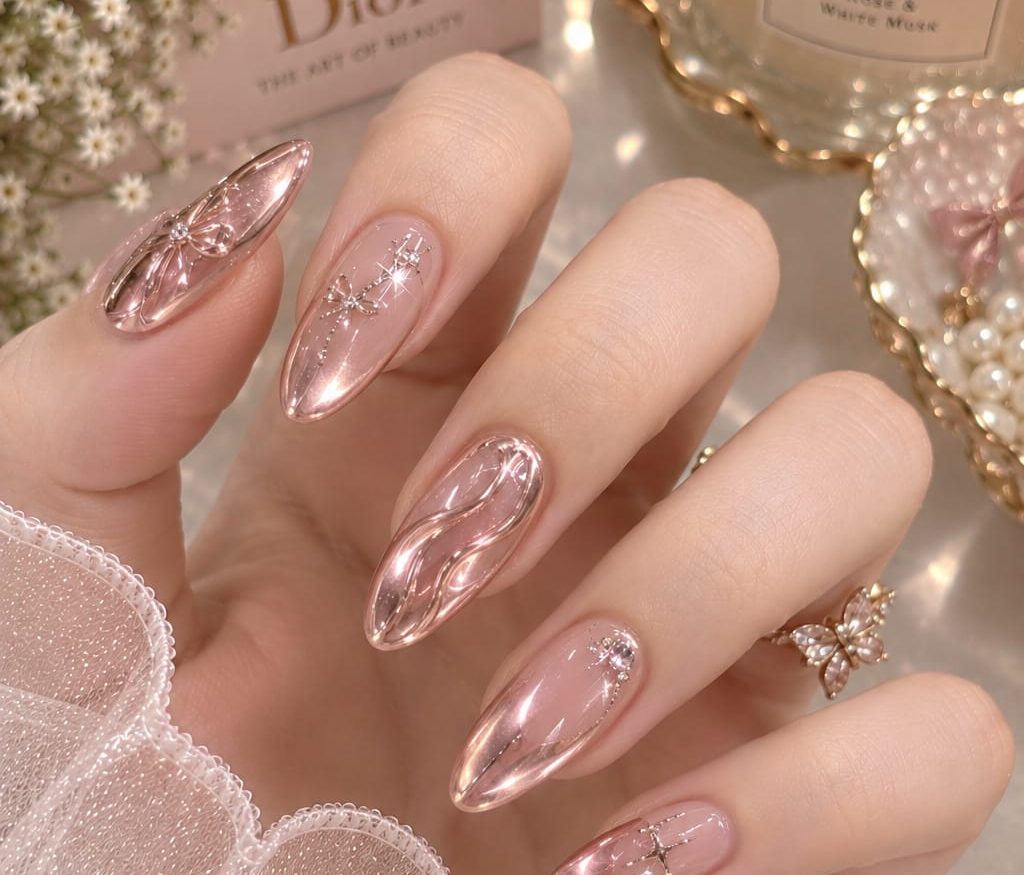
Whether you are looking to revamp your everyday look or preparing for a special occasion like a wedding or evening gala, rose gold chrome nails offer an unmatched level of elegance. In this comprehensive guide, we will explore why this trend is taking the beauty world by storm, how to recreate it step-by-step, and how to maintain that glass-like shine for weeks.
Why Rose Gold Chrome Nails Are Trending
The rise of the “Coquette” and “Balletcore” aesthetics, paired with modern Y2K metallic influences, has created a major surge in high-shine nail art. Rose gold is universally flattering across all skin tones because it perfectly balances warm gold hues with cool, soft pink undertones.
Key highlights of this design include:
- Metallic 3D Swirls & Bows: Raised line work adds depth, texture, and a liquid-metal effect.
- Nude & Sheer Bases: A translucent, natural base makes the rose gold metallic elements pop without overpowering the hand.
- Celestial Sparkles & Rhinestones: Fine starburst linework and tiny crystal accents add subtle glamour.
- Versatile Shape: Almond and oval nail shapes elongate the fingers while showcasing delicate nail art perfectly.
Anatomy of the Look: Key Elements
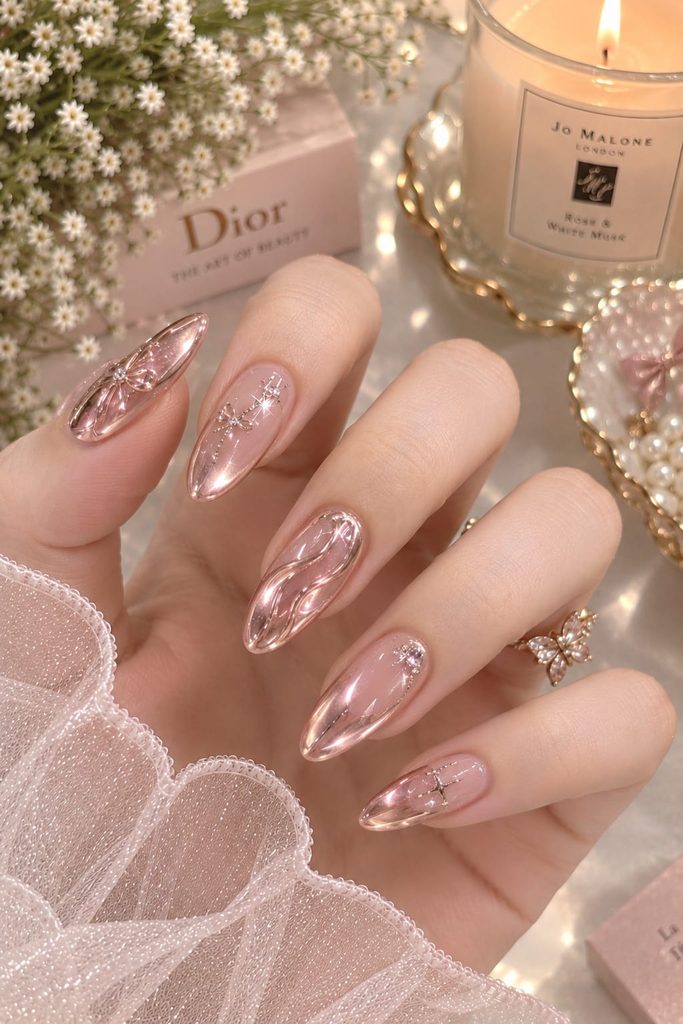
To understand what makes this specific manicure so striking, let’s break down its key design components:
| Design Element | Description & Technique |
| Nail Shape & Length | Almond shape, medium-to-long length for an elongating effect. |
| Base Color | Sheer, glossy blush pink or milky translucent gel base. |
| 3D Chrome Detailing | Raised gel linework finished with metallic rose gold chrome powder. |
| Artistic Accents | Delicate hand-painted ribbon bows, celestial stars, and fluid wave textures. |
| Glimmer & Gemstones | Micro-rhinestones placed at key focal points for high sparkle. |
How to Get the Look: Step-by-Step DIY Tutorial
Creating professional 3D chrome nails at home requires a bit of patience and the right tools, but the stunning results are well worth the effort!
What You’ll Need:
- Dehydrator & Primer
- Base Gel Coat & Glossy Non-Wipe Top Coat
- Sheer Pink/Nude Gel Polish
- Hard Gel / Builder Gel (or 3D Sculpting Gel) for raised details
- Fine Detail Nail Art Brush
- Rose Gold Metallic Chrome Powder & Silicone Applicator Brush
- Micro-Rhinestones & Rhinestone Glue
- UV/LED Nail Lamp
Step 1: Prep and Prime
- Gently push back your cuticles and file your nails into a smooth almond shape.
- Buff the surface lightly to remove shine.
- Apply a nail dehydrator followed by a primer to ensure long-lasting adhesion.
- Apply a thin layer of base coat and cure under your UV/LED lamp for 60 seconds.
Step 2: Apply the Sheer Base
- Apply 1 to 2 thin coats of a translucent blush-pink or jelly gel polish.
- Cure each layer under the UV/LED lamp.
- Apply a non-wipe top coat and cure thoroughly. (This step ensures the chrome powder will only stick to where you paint the 3D gel!)
Step 3: Sculpt the 3D Details
- Dip a fine detail brush into hard gel, builder gel, or sculpting gel.
- Carefully paint your desired 3D patterns:
- Accent 1: A dainty ribbon bow on your pointer finger.
- Accent 2: Fluid, organic liquid-metal waves down the middle nail.
- Accent 3: Curved French tip borders and starburst lines on the ring and pinky nails.
- Cure under the lamp for the recommended time (usually 30–60 seconds, depending on the gel product).
Step 4: Apply the Rose Gold Chrome Powder
- Use a silicone tool or sponge applicator to gently rub the rose gold chrome powder onto the raised gel designs.
- Watch as the clear raised gel instantly transforms into mirror-like liquid metal!
- Dust off any excess powder gently with a soft fluffy brush.
Step 5: Add Sparkles & Rhinestones
- Using a tiny dab of rhinestone gel, place micro-crystals at the centers of your celestial stars or bows.
- Cure under the lamp to secure the gems in place.
Step 6: Seal and Protect
- Cap the entire nail—especially the chrome powder areas—with a layer of high-gloss, scratch-resistant top coat.
- Cure for 60 seconds.
- Apply cuticle oil to keep your hands looking soft, hydrated, and salon-fresh!
Pro Tips for Long-Lasting Chrome Nails
- Double Top-Coat Chrome: Chrome powder can sometimes peel if not sealed correctly. Apply a thin layer of rubber base gel or builder gel over the chrome before your final top coat for extra durability.
- Clean Edges: Always use a clean brush dipped in isopropyl alcohol to clean up line work before curing.
- Moisturize Regularly: Keep cuticle oil and luxury hand creams nearby. Ultra-shiny nails look best paired with well-hydrated skin!
Final Thoughts
Rose gold chrome nails represent the ultimate blend of softness, luxury, and modern nail artistry. Whether you bring this inspiration photo to your favorite nail technician or try recreating it during a self-care weekend at home, this set is guaranteed to attract compliments wherever you go.