Whether you are looking to elevate your luxury style, re-create high-end salon trends at home, or discover how to maintain gel extensions, this ultimate guide will break down every single detail of this breathtaking nail look.
What Makes This Stiletto Gemstone Design Stand Out?
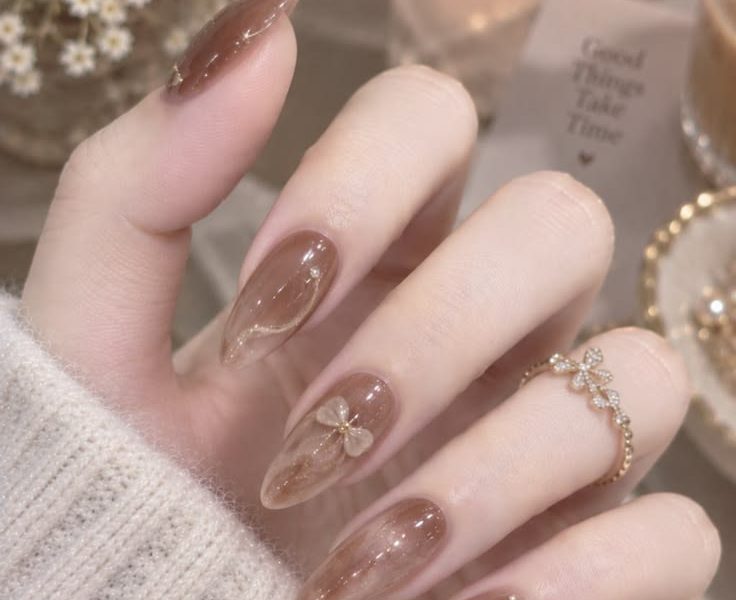
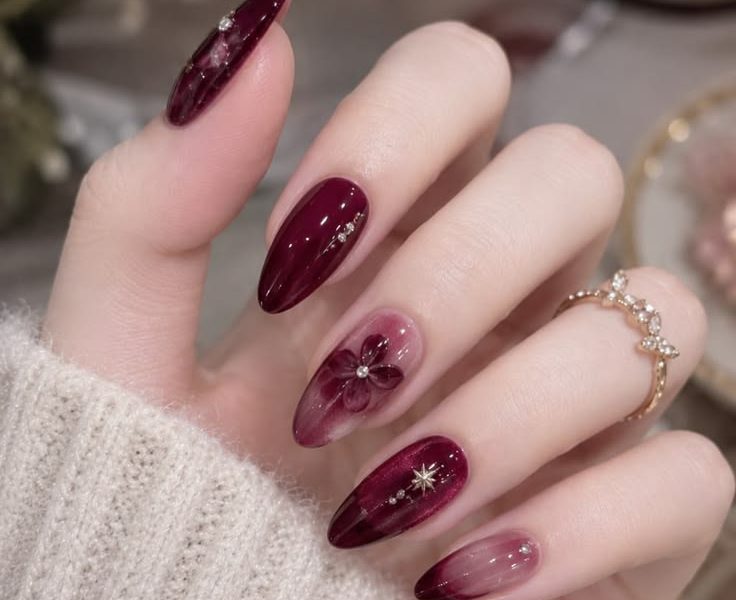
The image showcases a stunning set of long, translucent stiletto-shaped nails that mimic the appearance of cut gemstones, fine quartz crystal, and stained-glass artwork outlined with shimmering gold accents. Here are the core visual elements that make this design exceptional:
- Shape and Length: High-drama stiletto shape carved to a delicate point, extending the fingers and providing an elegant canvas.
- Translucent Glass Base: Clear or semi-clear builder gel/acrylic base that lets light pass through, giving a glass-like finish.
- Multi-Tone Color Palette: A refined gradient of dusty rose pinks, mauve quartz, smoky champagne, and iridescent clear tones across different nails.
- Geometric Foil & Crackle Pattern: Internal foil pieces and iridescent glass shards laid within the gel structure to create 3D depth and reflection.
- Detailed Gold Wire / Gel Outlines: Precision gold chrome or glitter gel lines tracing geometric facet shapes across the nail surface.
Key Style Elements & Visual Aesthetics

To fully understand why this aesthetic is dominating trend reports in beauty and nail artistry, we must explore its underlying design components:
1. The Power of Translucency
Unlike traditional opaque nail polishes, translucent glass nails play with ambient light. The light filters through the sheer colored jelly gels, illuminating the underlying foil particles and creating a glowing, inner luminosity.
2. The Quartz & Amethyst Palette
The subtle color transitions between deep rose-mauve and light translucent quartz add an artistic touch. Rather than painting every nail identically, this design uses harmonious tonal variations to create dynamic visual interest:
- Thumb & Pointer Finger: Light translucent pink with subtle gold webbed facets.
- Middle Finger: A clear/smoky quartz crystal tone loaded with iridescent shattered-glass flakes.
- Ring Finger: Rich amethyst/dusty plum tone with glowing internal dimension.
- Pinky Finger: Pale nude-rose glass finish tying the entire set together smoothly.
3. Gold Filigree and Geometric Facets
The gold detailing creates a mosaic or stained-glass effect. By framing the internal reflections with fine line artwork, the design achieves an exquisite architectural balance between organic crystal textures and structured geometric geometry.
Step-by-Step Tutorial: How to Re-create This Look
Achieving this high-end look requires patience, quality gel products, and precise nail preparation. Below is the step-by-step process used by professional nail artists.
Tools & Materials Needed
- Nail Prep: Dehydrator, Acid-free Primer, Cuticle Pusher, 180-grit Buffer.
- Extensions: Transparent Stiletto Forms or Clear Gel Extensions / Full-Cover Tips.
- Builder Gels: Clear Builder Gel (or Hard Gel/Polygel) for structural strength.
- Jelly/Glass Polishes: Translucent Rose Pink, Mauve/Plum, and Champagne/Nude Jelly Polishes.
- Art Supplies: Iridescent Crackle Foil / Shattered Glass Film, Gold Fine Art Gel or Gold Chrome Powder.
- Brushes & Lamps: Fine Liner Brush (7mm or 9mm), UV/LED Curing Lamp, High-Gloss Non-Wipe Top Coat.
Phase 1: Nail Preparation & Extension Base
- Sanitize & Clean: Thoroughly wash hands and sanitize all tools.
- Cuticle Work: Gently push back cuticles and remove any non-living tissue from the nail plate.
- Buff & Shape: Lightly buff the natural nail plate with a 180-grit buffer to remove shine.
- Dehydrate & Prime: Apply nail dehydrator followed by an acid-free primer to ensure maximum adhesion and prevent lifting.
- Apply Stiletto Forms/Tips: Apply clear stiletto forms or adhere clear full-cover stiletto tips. It is vital that the tips or forms are 100% transparent so light can pass through the finished design.
Phase 2: Building the Jelly & Gemstone Layer
- Base Gel Layer: Apply a thin layer of clear base gel and cure under an LED lamp for 60 seconds.
- Apply Jelly Tones:
- Paint pointer, thumb, and pinky with 1-2 thin coats of translucent rose pink jelly polish.
- Paint the ring finger with a deeper mauve/amethyst jelly tone.
- Leave the middle finger clear or apply a subtle champagne quartz tint.
- Do not cure yet if placing embedded foils into the wet gel!
- Embed Iridescent Glass/Foil:
- Cut tiny geometric shapes from iridescent shattered-glass foil.
- Press the foil pieces gently onto the uncured jelly layer or tacky layer of gel.
- Cure for 60 seconds.
Phase 3: Crystalline Encapsulation & Shaping
- Encapsulate with Clear Gel: Apply a generous layer of clear builder gel or hard gel over the entire nail to cover the foil pieces completely and construct a smooth apex.
- Cure: Full cure under UV/LED light for 60–90 seconds.
- Refine Shape: Wipe off the sticky inhibition layer with isopropyl alcohol. File the side walls and tips to sharpen the stiletto shape. Buffer the top surface smooth.
Phase 4: Stained-Glass Gold Detailing
- Line Artwork: Dip a ultra-fine liner brush into gold painter gel or metallic gold gel.
- Draw Facet Lines: Gently trace fine webbed geometric lines across each nail to resemble stained-glass frames or gemstone facets.
- Cure Line Work: Cure under the lamp for 60 seconds.
- Top Coat Application: Seal the entire masterwork with a scratch-resistant, high-gloss non-wipe top coat and cure for a final 90 seconds. Finish with hydrating cuticle oil.
Color Palette & Visual Composition Summary
| Nail | Primary Base Tint | Internal Effect | Outline Art |
| Thumb | Sheer Rose Quartz | Subtle Crushed Foil Reflection | Gold Stained-Glass Webs |
| Index (Pointer) | Sheer Dusty Rose | Embedded Glass Shards | Gold Gemstone Lines |
| Middle | Smoky Clear Quartz | High-Shine Diamond Foil | Fine Gold Webbing |
| Ring | Deep Amethyst Jelly | Multi-Dimensional Reflection | Gold Mosaic Lines |
| Pinky | Soft Champagne Nude | Light Reflective Sparkle | Delicate Gold Outlines |
Styling & Fashion Pairings: How to Wear Gemstone Nails
A statement manicure like this translucent stiletto set serves as an exquisite fashion accessory. Here are styling tips to complement this nail art:
1. Cozy & Luxurious Knits
As shown in the featured photo, pairing these crystalline nails with soft, textured knitwear (such as cream, ivory, or cashmere sweaters) creates a striking contrast between soft fabric and hard, brilliant crystal aesthetics.
2. Minimalist Gold & Diamond Jewelry
Because the nails feature delicate gold line art, pairing them with delicate gold rings, sparkling solitaire bands, or dainty diamond accents creates a cohesive, high-end look.
3. Evening Wear & Glamour
This style pairs effortlessly with elegant formal wear. A black slip dress, champagne satin blouse, or deep plum gown will highlight the rich jewel tones embedded in the nails.
How to Maintain Translucent Stiletto Gel Nails
Long stiletto nails demand attention and proper care to remain beautiful and intact. Follow these essential maintenance tips to extend the life of your manicure:
- Protect Your Nails as Tools: Never use your stiletto tips to open cans, unseal boxes, or pry items open. Always use the pads of your fingers.
- Hydrate Daily: Apply high-quality cuticle oil twice daily to keep the natural nail flexible and the surrounding skin nourished.
- Avoid Harsh Chemicals: Wear protective gloves when washing dishes, using household cleaning agents, or working in the garden to prevent discoloration or premature lifting.
- Schedule Timely Infills: Because translucent nails reveal growth underneath, schedule a fill or re-balance appointment every 2 to 3 weeks to keep the structure strong and balanced.
Frequently Asked Questions (FAQs)
Q1: Can this design be created on short natural nails?
While this look is optimized for long stiletto nails to showcase the stained-glass pattern, you can adapt the translucent jelly base and gold facet lines to almond, coffin, or short square shapes.
Q2: What is the difference between regular polish and jelly polish?
Regular polishes contain high opacity pigments designed to fully block light. Jelly polishes use translucent dyes that allow light to pass through, creating a see-through, glass-like finish.
Q3: How long does a intricate set like this take to perform at a salon?
A full sculpted set involving extensions, gel encapsulation, foil placement, and hand-painted line art typically takes between 2 to 3 hours with an experienced nail technician.
Final Thoughts
The translucent stiletto gemstone design is a breathtaking fusion of modern gel engineering and classic fine art. By incorporating translucent jelly bases, shattered glass foils, and hand-painted gold filigree, this set captures light from every angle and elevates any wardrobe. Whether you attempt this look at home or bring this guide to your favorite professional nail technician, these stained-glass quartz nails offer an unforgettable statement of elegance.