Whether you are a bride-to-be seeking the ultimate ethereal wedding nails, a manicure enthusiast looking to master advanced DIY techniques, or a beauty professional wanting to elevate your salon offerings, this comprehensive guide explores every facet of this iconic look.
1. Deconstructing the Look: Elements of Pearl Iridescent Nail Art

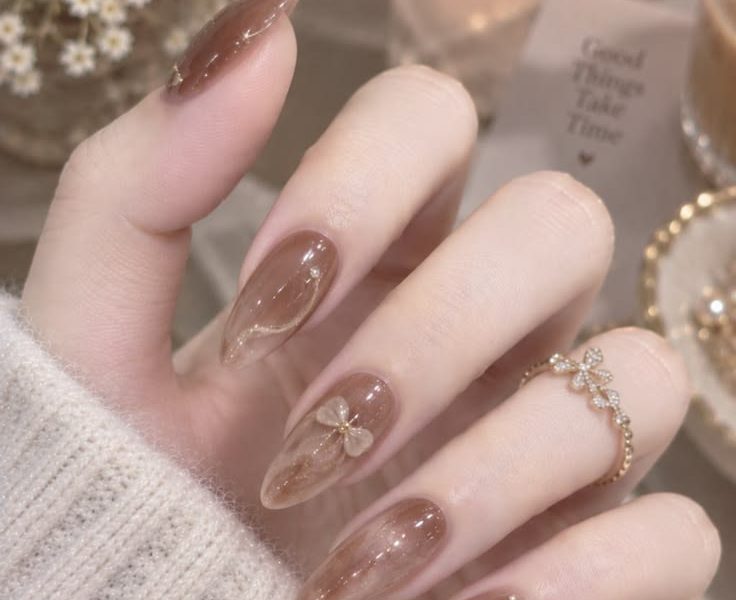
The manicure featured in the image is a masterclass in balance, texture, and light reflection. Unlike traditional flat polished nails or overly aggressive glitter applications, this design relies on subtle dimensions and luminous finishes.
JPG+ 1
+-------------------------------------------------------------------------+
|                      KEY DESIGN COMPONENTS                              |
+---------------------+---------------------------------------------------+
| Nail Shape & Length | Almond shape with medium-to-long extension        |
| Base Polish         | Translucent milky nude / soft blush pink base     |
| Surface Effect      | High-shine iridescent chrome / glazed pearl finish|
| Line Art & Accents  | Raised 3D gold chrome swirl lines & floral motifs |
| Embellishments      | Micro-pearls anchored with gel glue               |
| Background Theme    | Silk, satin, pearl aesthetic (Bridal / Luxury)    |
+---------------------+---------------------------------------------------+
The Almond Silhouette
The foundation of this manicure is the classic almond nail shape. Characterized by slender sides that taper gently toward a rounded peak, almond nails naturally elongate the fingers, creating a graceful, slender hand appearance. This shape provides a soft, organic canvas that perfectly balances structured 3D accents.
JPG+ 2
The Iridescent Glaze Finish
At the heart of the design is a glowing, opalescent chrome layer. Applied over a milky sheer or soft blush nude gel base, the white-pearl chrome powder reflects soft iridescent blues, pinks, and golds depending on how the light catches the surface. This creates a multidimensional “glass skin” effect across the nails.
JPG+ 2
Delicate 3D Gold Line Work & Pearl Studs
What elevates this set from a classic chrome manicure to custom nail art is the tactile 3D elements:
JPG
- Fluid Swirls: Curved 3D lines sculpted with clear builder gel or relief gel, finished in metallic champagne gold, mimic liquid movement. JPG
- Floral & Sunburst Reliefs: Micro-detailed textured petals crafted on accent nails center around tiny pearls to create delicate floral emblems. JPG
- Embedded Micro Pearls: Strategically placed along the 3D gold lines, small, flat-back pearls anchor the design, reinforcing the nautical, oceanic elegance. JPG
2. Why This Trend Is Dominating Modern Nail Fashion
The Clean Girl & Quiet Luxury Aesthetic
The beauty industry has shifted significantly toward “quiet luxury”—styles that feel high-end, curated, and understated yet visually striking. Pearl iridescent nails fit this ethos effortlessly. Rather than relying on loud neon colors or heavy, blocky rhinestones, the look leverages light reflection, metallic accents, and refined nude bases.
JPG
Ethereal Bridal Popularity
Bridal nail trends have evolved far beyond the classic white French tip. Modern brides prefer manicures that complement intricate lace, satin gowns, pearl veils, and fine jewelry. The soft pearl finish and warm gold accents make this design one of the most requested bridal nail styles across high-end bridal studios globally.
JPG
Seasonless Versatility
While exceptionally popular during wedding season, spring, and summer, the soft metallic warm-gold and cool-iridescent contrast makes this design suitable year-round. It transitions effortlessly from formal gala attire to elevated everyday streetwear.
JPG
3. Step-by-Step Tutorial: How to Recreate the Look
Creating a professional-grade 3D pearl iridescent manicure requires precise layering, high-quality materials, and appropriate gel equipment. Below is a detailed walkthrough of the professional technique.
  +---------------------------------------------------+
  | STEP 1: Prep & Base Application                   |
  +---------------------------------------------------+
                            |
                            v
  +---------------------------------------------------+
  | STEP 2: Milky Sheer Gel & Non-Wipe Top Coat       |
  +---------------------------------------------------+
                            |
                            v
  +---------------------------------------------------+
  | STEP 3: Pearl Chrome Powder Buffing               |
  +---------------------------------------------------+
                            |
                            v
  +---------------------------------------------------+
  | STEP 4: Sculpting 3D Swirls & Floral Textures     |
  +---------------------------------------------------+
                            |
                            v
  +---------------------------------------------------+
  | STEP 5: Gold Chrome Application & Pearl Placement |
  +---------------------------------------------------+
                            |
                            v
  +---------------------------------------------------+
  | STEP 6: Final Seal & Nourishment                  |
  +---------------------------------------------------+
Essential Materials Checklist
- Nail Prep: 180-grit buffer, cuticle pusher, dehydrator, and acid-free primer.
- Base Layer: Rubber base gel or clear builder gel for nail reinforcement.
- Color Base: Sheer milky-white or soft nude-pink gel polish.
- Chrome Effect: Fine pearl/opalescent chrome powder (white pearl pigment) & silicone sponge applicator.
- 3D Texturing: Hard clear builder gel, 3D relief gel, or non-wipe sculpture gel.
- Metallic Details: Gold chrome powder or high-viscosity metallic gold gel paint.
- Embellishments: Flat-back micro pearls in varying sizes (0.8mm to 2mm).
- Sealing & Care: Non-wipe top coat, matte top coat (optional for selective chrome techniques), gel glue, and cuticle oil.
Step 1: Precision Nail Preparation
- Shape: File natural nails or gel extensions into a balanced almond shape. Ensure the apex is symmetrical and the sidewalls taper evenly. JPG
- Cuticle Care: Gently push back cuticles, remove non-viable tissue using a fine diamond bit or cuticle nippers, and buff the surface lightly to remove shine.
- Dehydrate & Prime: Wipe the nail plate with isopropyl alcohol (90%+ strength). Apply dehydrator followed by an acid-free primer to ensure maximum adhesion and prevent lifting.
Step 2: Foundation & Base Color Application
- Base Gel: Apply a thin, even layer of rubber base gel to strengthen the nail bed. Cure under a UV/LED lamp for 60 seconds.
- Milky Color Gel: Apply one to two thin coats of a sheer, milky-pink or soft-white gel polish. Cure each layer for 60 seconds. The base should remain translucent rather than fully opaque to create depth. JPG+ 1
- Prep for Chrome: Apply a smooth coat of non-wipe top coat. Cure for 30–45 seconds (depending on your lamp’s wattage—over-curing can prevent chrome powder from adhering properly).
Step 3: Buffing the Pearl Chrome Effect
- Rub in Pigment: Using a silicone applicator or a soft eyeshadow sponge, pick up a tiny amount of pearl chrome powder. Gently rub it onto the cured non-wipe top coat until a smooth, mirror-like opalescent sheen appears. JPG+ 1
- Dust Off Excess: Use a plush, dust-free brush to gently remove all excess loose powder particles around the cuticle and sidewalls.
- Protection Layer: Apply a thin layer of clear builder gel or base gel over the chrome to lock the pigment in place and prevent chipping at the tips. Cure for 60 seconds.
Step 4: Sculpting 3D Swirls & Floral Art
- Draw 3D Waves: Dip a fine liner brush (7mm–9mm) into clear 3D relief gel or non-wipe sculpting gel. Draw smooth, flowing curved lines along the length of the nail. JPG
- Create Petal Texture: On the accent nail, paint delicate flower petals radiating outward from a central point using thicker strokes of relief gel to create raised ridges. JPG
- Flash Cure: Cure immediately for 10–15 seconds per line to freeze the gel height and prevent the 3D detail from flattening before curing fully for 60 seconds.
Step 5: Applying Gold Metallic Accents & Pearls
- Gold Finish: Using a micro-detail brush, paint over the raised 3D lines and flower centers using gold metallic gel paint, or rub gold chrome powder strictly over the raised 3D gel. JPG
- Attach Pearls: Apply tiny drops of gem glue or thick builder gel at key intersection points along the curved lines and in the center of the floral motif. JPG
- Place Micro-Pearls: Using a wax picker tool, press micro-pearls securely into the gel. Ensure each pearl is surrounded by a tiny bead of gel to lock it in place. JPG+ 1
- Final Cure: Cure under the LED lamp for a full 90 to 120 seconds to guarantee complete hardening of the dense gel around the embellishments. JPG
Step 6: Sealing and Finishing
- Top Coat Application: Carefully float a high-shine non-wipe gel top coat over the entire nail surface. Use a fine liner brush to paint around the base of the micro-pearls and raised 3D lines rather than flooding over them, which preserves their sharp texture. JPG
- Edge Sealing: Run the top coat brush along the free edge to seal the chrome layers against moisture ingress and daily wear.
- Final Cure & Aftercare: Perform a final 60-second cure. Allow the nails to cool for 30 seconds before applying a rich, vitamin-E infused cuticle oil around the surrounding skin for a healthy, polished photograph finish. JPG
4. Maintenance and Aftercare Tips
3D embellished nails require appropriate care to maintain their structural integrity and mirror finish.
JPG
+-------------------------------------------------------------------------+
|                        NAIL CARE & MAINTENANCE                          |
+----------------------+--------------------------------------------------+
| Daily Protection     | Wear rubber gloves when handling cleaning chemicals|
| Hydration Routine    | Apply cuticle oil twice daily to nourish matrix  |
| Mechanical Stress    | Never use nails as tools (e.g., opening cans)    |
| Longevity Window     | Ideal wear time: 3 to 4 weeks before refilling   |
+----------------------+--------------------------------------------------+
Protecting 3D Embellishments
- Avoid Hard Impacts: While builder gels are resilient, localized pressure against 3D raised lines or pearls can cause them to pop off or chip. JPG
- Chemical Protection: Always wear gloves when cleaning, doing dishes, or using household chemicals. Solvents like acetone or bleach dull the high-shine chrome layer and degrade gem adhesives.
Preserving Chrome Brilliance
- Cuticle Oil Hygiene: Apply cuticle oil directly to the skin around the matrix rather than dumping excessive oil over the top of the nail surface, which can temporarily mask the optical reflection of pearl chrome.
- Wipe Dirt Lightly: If your nails collect makeup, foundation, or dirt around the raised 3D ridges, gently scrub them using a soft toothbrush and mild soap under warm water.
5. Nail Shape Adaptations: How This Look Fits Other Profiles
While this design shines brightly on almond nails, the aesthetic can be adapted to fit different natural nail types and preferred lengths.
JPG
+------------------+------------------------------------------------------+
| NAIL SHAPE       | STYLING ADJUSTMENT                                   |
+------------------+------------------------------------------------------+
| Almond           | Original ideal canvas; balances linear liquid art    |
| Oval             | Softens 3D swirls; ideal for shorter natural nails   |
| Coffin / Ballerina| Use sharper angular lines; accentuates dramatic edge |
| Square           | Focus 3D art diagonally across corners for softness  |
| Stiletto         | Dramatic elongated lines; ideal for couture art      |
+------------------+------------------------------------------------------+
1. Oval Nails
For clients with shorter natural nails, oval shapes preserve the soft, romantic feel of this design. Scale down the size of the micro-pearls (0.8mm) and use finer 3D lines to keep the design proportioned.
JPG+ 1
2. Coffin/Ballerina Nails
On square or coffin shapes, replace fluid organic swirls with diagonal 3D curves or geometric pearl placements. The crisp edges of coffin nails contrast dramatically with soft iridescent finishes.
JPG+ 1
3. Stiletto Nails
For high-drama editorial looks, stiletto shapes allow extended space for intricate floral motifs, multi-layered liquid gold swirls, and cascading pearl arrangements across the entire length.
JPG
6. Color Variations to Match Different Wardrobes & Themes
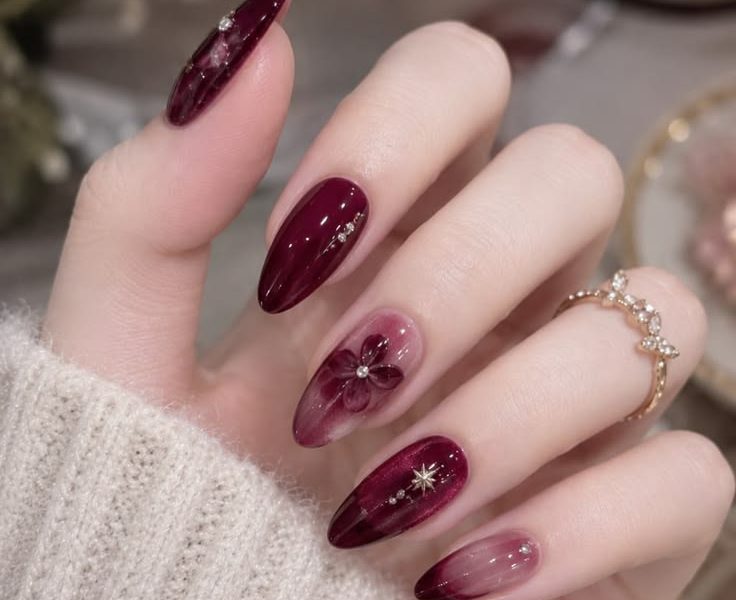
The core design technique—iridescent chrome + 3D gel + metallic trim + pearls—can be customized across various color palettes.
JPG
+-------------------+--------------------+------------------+-------------------+
| VARIATION         | BASE SHADE         | CHROME FINISH    | METALLIC DETAIL   |
+-------------------+--------------------+------------------+-------------------+
| Celestial Moonlight| Milky Sky Blue     | Silver Pearl     | Metallic Silver   |
| Rose Gold Goddess | Soft Peach Pink    | Golden Peach     | Rose Gold Chrome  |
| Emerald Enchanted | Deep Sheer Sage    | Green Opalescent | Warm Bronze Gold  |
| Velvet Lavender   | Pastel Sheer Lilac | Violet Pearl     | Champagne Gold    |
+-------------------+--------------------+------------------+-------------------+
- Celestial Moonlight: Use a sheer icy-blue gel base, silver pearl chrome, and metallic silver 3D line art paired with classic white pearls.
- Rose Gold Goddess: Combine a soft peach-pink base with warm golden-pink chrome and rose-gold metallic line work for a warmer skin-tone complement.
- Velvet Lavender: Swap the nude base for a sheer lavender polish. The violet-to-blue color shift in the chrome powder creates an ethereal, magical look. JPG
7. Troubleshooting Common DIY & Professional Challenges
Even experienced nail technicians encounter technical issues when working with dense pigments and raised 3D gels. Below are solutions to common mistakes:
Problem 1: Chrome Powder Peeling at the Free Edge
- Cause: Chrome powder adhered directly to the tip edge without being properly sealed or capped.
- Solution: Before top coating, lightly file the very tip of the free edge with a fine buffer to remove chrome dust from the outer rim. Then, wrap your base gel and non-wipe top coat around the edge to seal it.
Problem 2: 3D Gel Lines Flattening Out
- Cause: Using low-viscosity (runny) gel or waiting too long before curing.
- Solution: Work on one or two nails at a time and perform a quick 10-second flash cure after drawing each line to set the 3D relief height. Switch to dedicated high-viscosity “sculpting gel” or “hard gel.”
Problem 3: Pearls Pop Off Within Days
- Cause: Surface top coat was applied before sticking the pearls, or the gel adhesive was insufficient.
- Solution: Always nestle pearls into a droplet of thick builder gel or dedicated rhinestone resin on an un-topcoated surface. Ensure gel completely surrounds the base of each pearl before curing. JPG
8. Final Thoughts: The Timeless Appeal of Pearl Artistry
This pearl iridescent almond nail design represents a harmonious union of vintage elegance and cutting-edge nail engineering. By layering light-reflecting pigments, tactile 3D reliefs, and classic pearl accents, it achieves a high-fashion look that remains wearable and sophisticated.
JPG+ 1
Whether styled for a wedding, special celebration, or as an everyday expression of personal glamour, mastering this multi-textured technique will elevate any manicure portfolio. Experiment with line curves, pearl arrangements, and base tones to make this iconic style uniquely your own!
JPG+ 1